{shinyMobile} Hands-on
David Granjon
2021-07-09
Hosted by 
Hi there 🍕
We're in for 2 hours of fun!
- Grab a ☕
- Make yourself comfortable 🛋 or 🧘
- Ask questions ❓

David
Senior Expert Data Scientist, Novartis
Program
Mobile app development with {shiny}, {golem} et {shinyMobile}
Learning objectives:
- 👩🏫 State of the art.
- 👨🏫
{shinyMobile}introduction: components, templates, themes ... - Setup a production app.
Discover progressive web apps (PWA) and create a simple example, built on top the previous part.
Learning objectives:
- Discover what is a progressive web app.
- Step by step development.
- Overview of what are the next steps and limitations.
Part 1.1 Introduction to {shinyMobile}
Mobile development
Classic web apps are not optimized for mobile platforms.
- Rarely consider the small display.
- Harder to access (no launch icon).
- Harder to focus if not fullscreen.
- Don't work offline.
Mobile development
Classic web apps are not optimized for mobile platforms.
- Rarely consider the small display.
- Harder to access (no launch icon).
- Harder to focus if not fullscreen.
- Don't work offline.
Appearance is critical for end user. 💇
Mobile development
😈 Let's go native!
Well ... it's quite complex:
- Know multiple languages: Java, Swift, ...
- Maintain multiple code bases.
Mobile development
😈 Let's go native!
Well ... it's quite complex:
- Know multiple languages: Java, Swift, ...
- Maintain multiple code bases.
❓ Isn't there something simpler?
Progressive web apps (PWA)
Take some advantages of both worlds:
- Can be installed on the device ...
- ... But run via a web browser.
- Provide offline features (don't expect too much).
- One code base (web languages).
Progressive web apps (PWA)
Take some advantages of both worlds:
- Can be installed on the device ...
- ... But run via a web browser.
- Provide offline features (don't expect too much).
- One code base (web languages).
😭 Less performance than native.
Mobile app development and {shiny}?
Let's be honest, there is almost nothing 😭.
- Many shiny apps are not optimized for mobile.
- Vertical design.
- Overflow.
- Poor user experience.
Mobile app development and {shiny}?
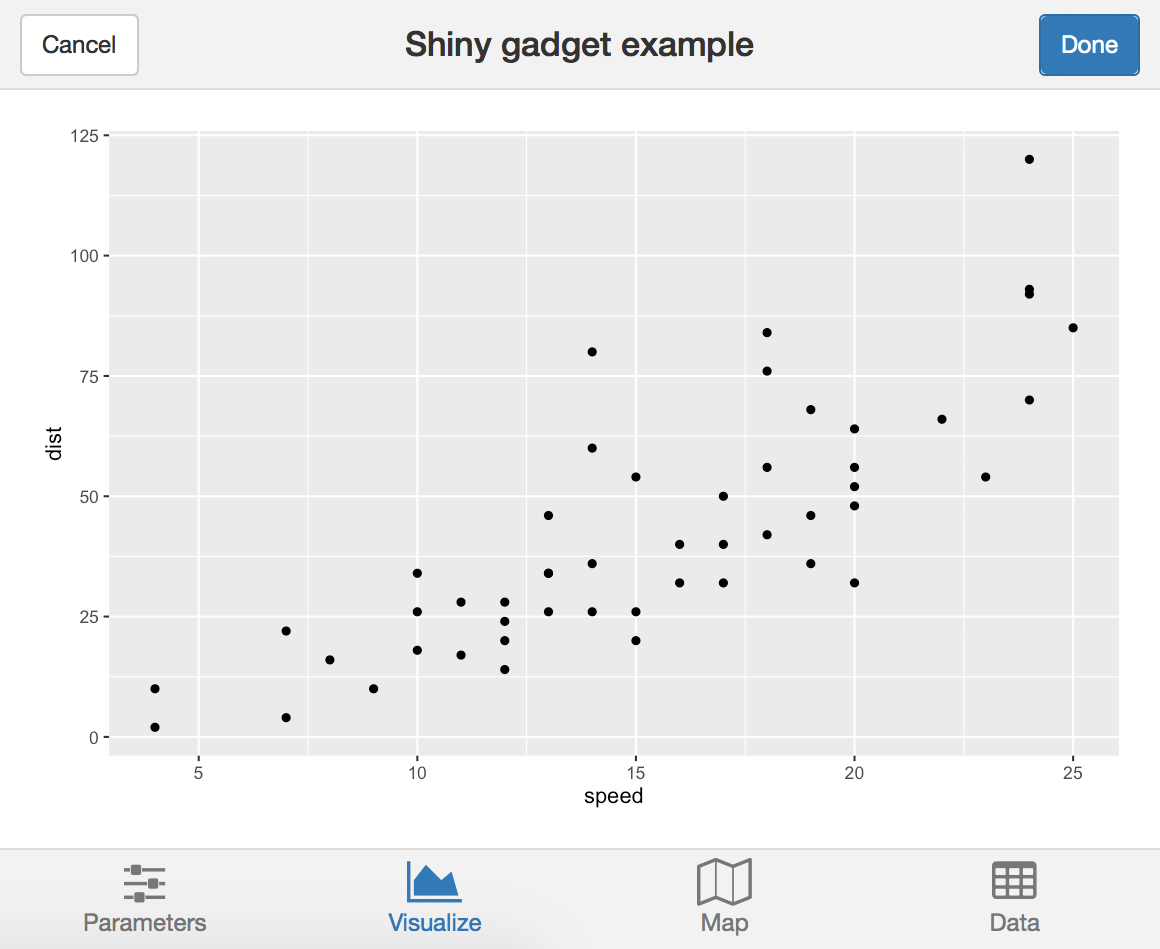
{miniUI} exists but not really for mobile development.
Welcome {shinyMobile}?
Built on top of the Framework7 web framework.
- Native look and feel for iOS and Android
- PWA support.
- ... also works for desktop apps 😏
Key features: Layout
f7SingleLayout(): one page app.f7TabLayout(): multi-tabs app.
Key features: Skins
- iOS.
- Android.
Key features: Themes
2 themes:
Demo app: {deminR}
- {deminR}, 2020 Shiny Contest.
- https://dgranjon.shinyapps.io/deminR
- https://github.com/DivadNojnarg/deminR

Your turn 🧪!

Part 1.2 Project setup
Initialize the project: {truelle}
We'll be using {golem} ...
Initialize the project: {truelle}
We'll be using {golem} ...

... {truelle} is a {golem} GUI generator 🧙♂️!
- Open the RStudio Server.
- Run
truelle::run_app(). - Follow the steps.
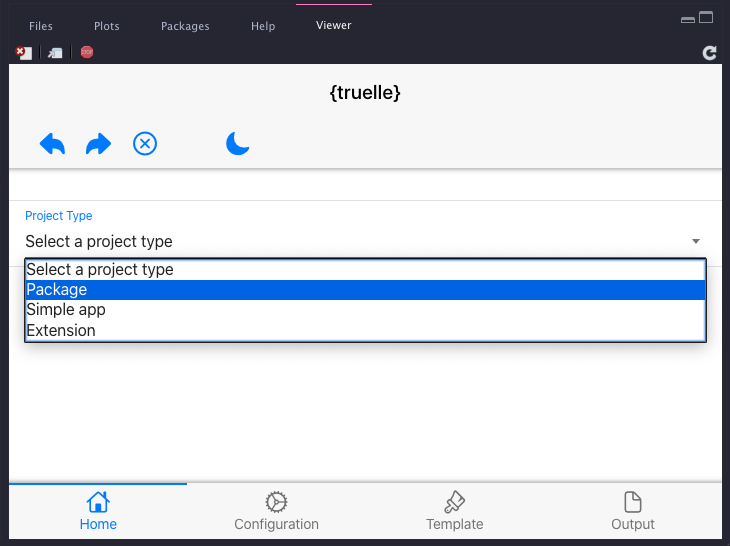
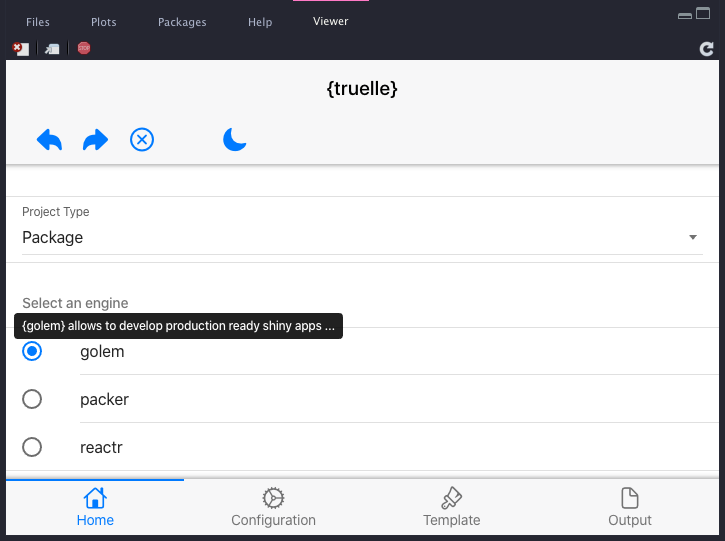
{truelle}: project type
Select Package and choose the {golem} engine.
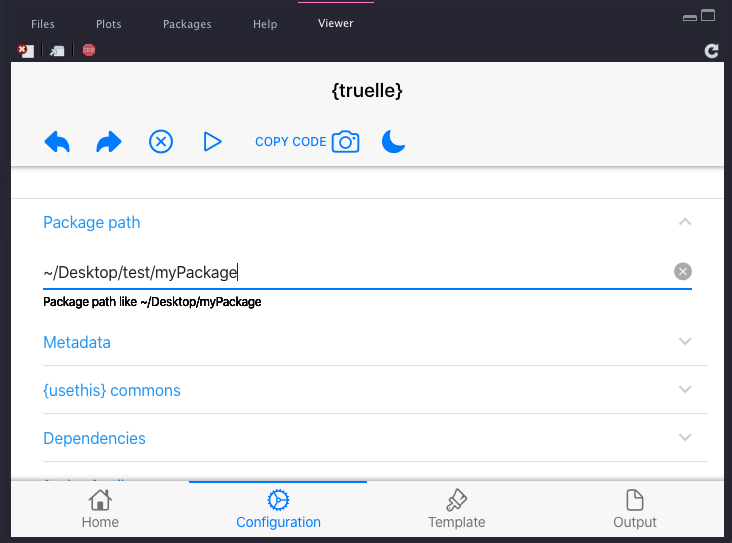
{truelle}: Package options
Provide a valid package path and review project options.
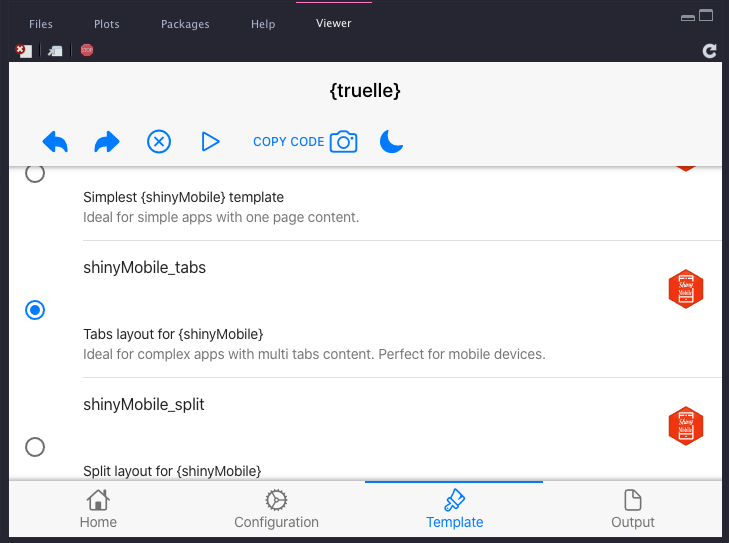
{truelle}: UI template
Select {shinyMobile} tabs layout.
{truelle}: Run the output and enjoy 😎!
Click on the ⏯ button or copy/paste 📸 the code to your terminal...
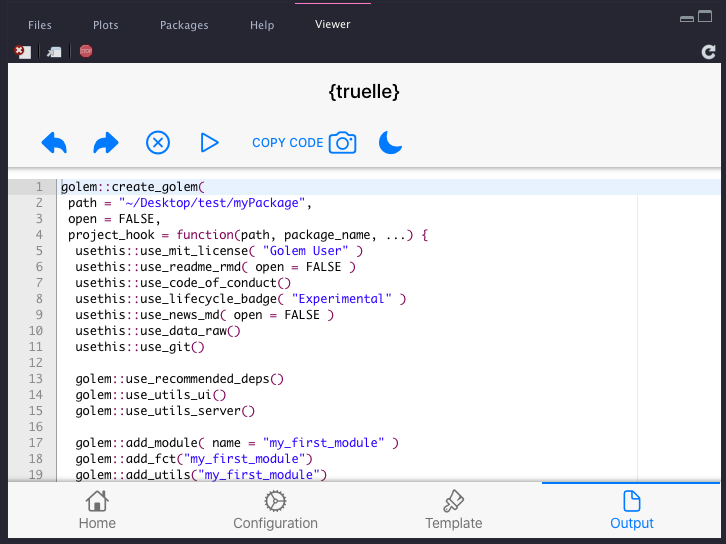
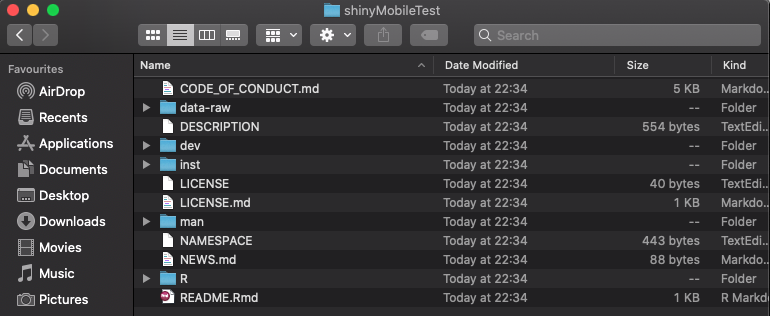
Congrats 🎈! We now have a production ready {shinyMobile} project.
Part 1.3 {shinyMobile}'s main features
{shinyMobile}: App preview
Your turn 🧪
{shinyMobile}allows app preview (local or remote).- Remote preview:
shinyMobile::preview_mobile( url = "https://connect.thinkr.fr/shinyMobile1/", device = "iphone8"){shinyMobile}: App preview
Your turn 🧪
{shinyMobile}allows app preview (local or remote).- Remote preview:
shinyMobile::preview_mobile( url = "https://connect.thinkr.fr/shinyMobile1/", device = "iphone8")- Open the new project.
- Run
devtools::load_all(). - Run the app in a separate R process (only works with local RStudio):
processx::process$new( "Rscript", c("-e", sprintf( "thematic::thematic_shiny(); shiny::runApp('%s', port = %s)", "./inst/app", 3434 ) ))shinyMobile::preview_mobile( url = "http://localhost:3434", device = "iphone8")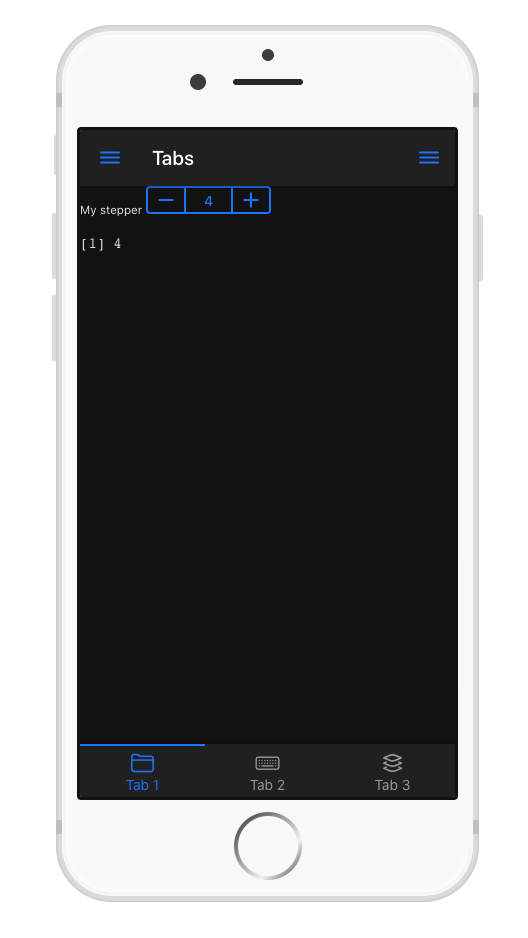
{shiny} VS {shinyMobile}: Main UI wrapper
library(shiny)ui <- fluidPage( # ui logic)server <- function(input, output, session) { # server logic}shinyApp(ui, server){shiny} VS {shinyMobile}: Main UI wrapper
library(shiny)ui <- fluidPage( # ui logic)server <- function(input, output, session) { # server logic}shinyApp(ui, server)library(shiny)library(shinyMobile)ui <- f7Page( # shinyMobile layout functions)server <- function(input, output, session) { # server logic}shinyApp(ui, server){shinyMobile}: app options
f7Page()exposes an options parameter.- Fine tune the app appearance and behavior:
- Theme, colors, ...
- Dark mode (default to TRUE).
- tapHold (WHAAAAT???).
- navbar and toolbar options.
- ...
- Options inherited from Framework7.
{shinyMobile}: app options
f7Page()exposes an options parameter.- Fine tune the app appearance and behavior:
- Theme, colors, ...
- Dark mode (default to TRUE).
- tapHold (WHAAAAT???).
- navbar and toolbar options.
- ...
- Options inherited from Framework7.
Your turn 🥼
- Inspect the ./R/app_ui.R code and experiment with some of the options.
- Run
devtools::load_all()andrun_app().
{shinyMobile}: the tab layout
We leverage the f7TabLayout() function:
f7TabLayout(..., navbar, messagebar = NULL, panels = NULL, appbar = NULL)- ... are the tabs contained in
f7Tabs(). f7Tabs()may host multiplef7Tab().- navbar expects an
f7Navbar(). - We don't care about other parameters for now.
{shinyMobile}: the tab layout
We leverage the f7TabLayout() function:
f7TabLayout(..., navbar, messagebar = NULL, panels = NULL, appbar = NULL)- ... are the tabs contained in
f7Tabs(). f7Tabs()may host multiplef7Tab().- navbar expects an
f7Navbar(). - We don't care about other parameters for now.
Your turn 🧪
- Inspect the ./R/app_ui.R code and find the corresponding pieces.
- Add a new
f7Tab()element. Hint:f7Tab(..., tabName, icon = NULL, active = FALSE, hidden = FALSE). - Run
devtools::load_all()andrun_app().
{shinyMobile}: the navbar
f7Navbar():
- Contains title, subtitle.
- Optional subNavbar with
f7SubNavbar(). - Other parameters offer cosmetic options:
- shadow.
- horizontal line.
- transparent.
- ...
{shinyMobile}: the navbar
f7Navbar():
- Contains title, subtitle.
- Optional subNavbar with
f7SubNavbar(). - Other parameters offer cosmetic options:
- shadow.
- horizontal line.
- transparent.
- ...
Your turn 🥼
- In ./R/app_ui.R, modify the navbar title.
- Add a subtitle.
- Add a
f7SubNavbar()such as:
f7SubNavbar( f7Button(label = "My button"), f7Button(label = "My button"), f7Button(label = "My button"))- Turn the leftPanel and rightPanel to
FALSE. - Set hairline to
FALSE. - Run
devtools::load_all()andrun_app().
{shinyMobile}: components
{shinyMobile} exposes many components:
- Containers:
f7Card(),f7List(),f7Block(), ... - Inputs:
f7Text(),f7Checkbox(),f7Toggle(), ... - Notifications:
f7Notif(),f7Dialog(),f7ActionSheet(), ... - Buttons:
f7Button(),f7TabLink(), ... - Metric:
f7Gauge(),f7Progress(), ...
Most of them can be updated server side!
Your turn 🧪
- In ./R/app_ui.R, add a new
f7ExpandableCard()in the previously addedf7Tab(). - Give it an id.
- Below the card add a
f7Button("openCard", "Click me!"). - In ./R/app_server.R add this code, replacing
<CARD_ID>:
observeEvent(input$openCard, { updateF7Card(id = <CARD_ID>)})- Run
devtools::load_all()andrun_app().
Part 2.1 Introduction to PWA
Progressive web apps
Progressive web apps or (PWA) improve classic web apps capabilities by obeying these three rules:
- Being capable: media control, file system access, …
- Being reliable: fast and usable offline. Transparent failures.
- Being installable: Standalone use, launch from user’s home screen.
In the following we'll treat 2 and 3.
How can my app be installable?
- The app must be served over HTTPS (shinyapp.io, ...).
- Include a manifest, that is a JSON file specifying app metadata (name, icons, ...).
- Have a registered service worker, which can cache the app content and provide offline support.

What is a web manifest?
A JSON file which can be interpreted by the web browser (Chrome, Safari, Firefox, Brave, ...).
{ "name": "My Progressive Web App", "short_name": "My App", "description": "What it does!", "lang": "en-US", "start_url": "https://dgranjon.shinyapps.io/shinyMobileGolemTest/", "display": "standalone", "background_color": "#ffffff", "theme_color": "#ffffff", "icons": [ { "src": "icons/icon-144.png", "sizes": "144x144" } ], ...}Most important fields:
- start_url: where your app is hosted.
- display: use standalone for native look and feel.
- icon: an array pointing to icons (useful for favicon, launch screen ...) in the
wwwfolder.
Check compatibility support here.
In a Shiny app context, the manifest goes in www.
The service worker
Script run in the background by the web browser.
self.addEventListener("install", (event) => { event.waitUntil( (async () => { const cache = await caches.open(CACHE_NAME); // Setting {cache: 'reload'} in the new request will ensure that the // response isn't fulfilled from the HTTP cache; i.e., it will be from // the network. await cache.add( new Request(OFFLINE_URL, { cache: "reload" }) ); await cache.add( new Request("framework7-5.7.14/css/framework7.bundle.min.css", { cache: "reload" }) ); // add other resources to cache below })() ); // Force the waiting service worker to become the active service worker. self.skipWaiting();});Features:
- Requires HTTPS.
- Able to store app resources (CSS, JS, images, HTML, ...) in the application cache ...
- ... Thereby making them available offline.
- Many plug and play template here and there.
Script composed of 3 steps:
- Installation + cache configuration (see left code).
- Activation.
- Fetch requests (fill the cache, ...)
Part 2.2 Develop a PWA with {shinyMobile}
Road to PWA : enable PWA
Good new 😃!
Road to PWA : enable PWA
Good new 😃!
{shinyMobile} is PWA ready 😎.
Road to PWA : enable PWA
Good new 😃!
{shinyMobile} is PWA ready 😎.
Just turn on the allowPWA to TRUE in f7Page(). Under the hood, it adds all the required machinery 🧙.
Road to PWA : Modify {golem} package
Your turn 🥼
- Open
./R/app_ui.R. - Scroll down to the
golem_add_external_resourcesfunction. - Comment out the code as shown on the left (to avoid conflicts with
{shinyMobile}PWA assets). - Call
golem::add_ui_server_files().
golem_add_external_resources <- function(){ #add_resource_path( # 'www', app_sys('app/www') #) tags$head( #favicon(), #bundle_resources( # path = app_sys('app/www'), # app_title = 'shinyexample' #) # Add here other external resources # for example, you can add shinyalert::useShinyalert() )}Road to PWA : add PWA files (1/2)
Time consuming, need automated approach... The below script:
Road to PWA : add PWA files (1/2)
Time consuming, need automated approach... The below script:
# Important to target the app folder.# Only work if app is in a package.# register_service_worker is FALSE, shinyMobile already does it.# We also don't need to create web dependencies. charpente::set_pwa( "inst/app", register_service_worker = FALSE, create_dependencies = FALSE)Road to PWA : add PWA files (1/2)
Time consuming, need automated approach... The below script:
# Important to target the app folder.# Only work if app is in a package.# register_service_worker is FALSE, shinyMobile already does it.# We also don't need to create web dependencies. charpente::set_pwa( "inst/app", register_service_worker = FALSE, create_dependencies = FALSE)- Creates a web manifest.
- Adds a service worker.
- Adds placeholder icons (you may need to create your own later).
- Adds an offline HTML template page.
Road to PWA: add PWA files (2/2)
Your turn 🧪
- Run
charpente::set_pwa("inst/app", register_service_worker = FALSE, create_dependencies = FALSE)inside your project. - Run
devtools::load_all()andrun_app(). - Once the RStudio viewer opens, click on
Open in Browser. - Note the app URL:
https://baka.thinkr.fr/<CONTAINER_ID>/rstudio/p/<RSTUDIO_TOKEN>/. - Copy it in the
./inst/app/www/manifest.webmanifeststart_url field.
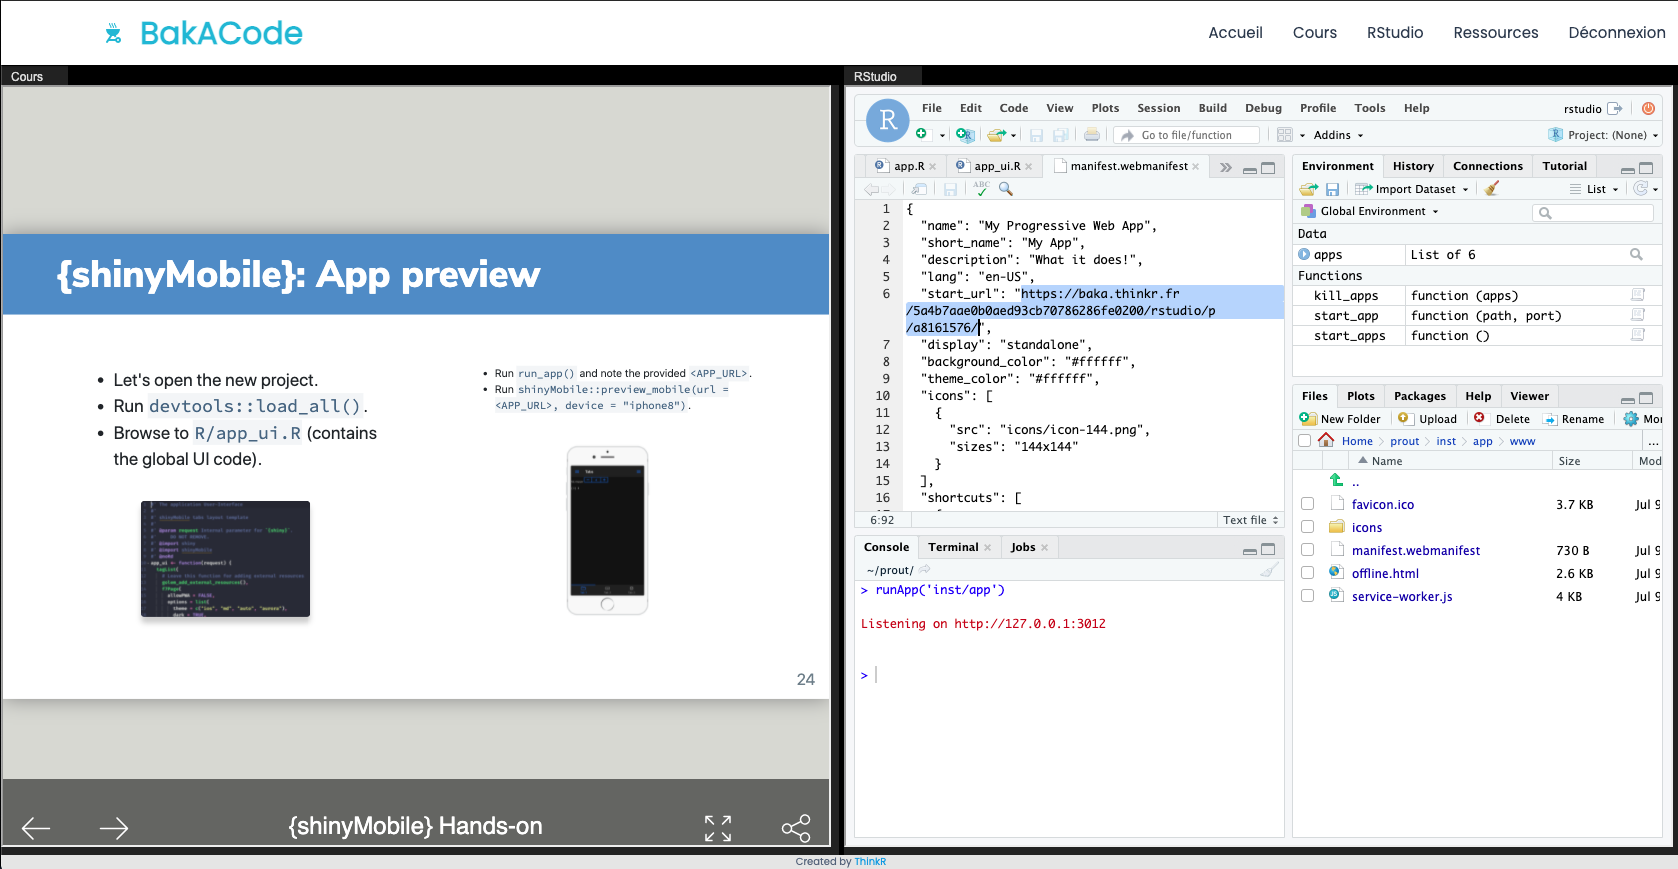
This workshop is hosted by ThinkR on a dedicated server. If you are working locally, first deploy your app to a secure server (with HTTPS like shinyapps.io). PWA features don't work locally!!!
Road to PWA: Check your app (1/3)
Your turn 🧪
- App is already running in Chrome.
- If App does not work: use
https://dgranjon.shinyapps.io/shinyMobileGolemTest. - Open the Chrome developer tools: ⌥ + ⌘ + I (Mac), ctrl + shift + I (windows).
- Follow the steps showed in the figure (in red).
- Click on
Generate reportand wait.
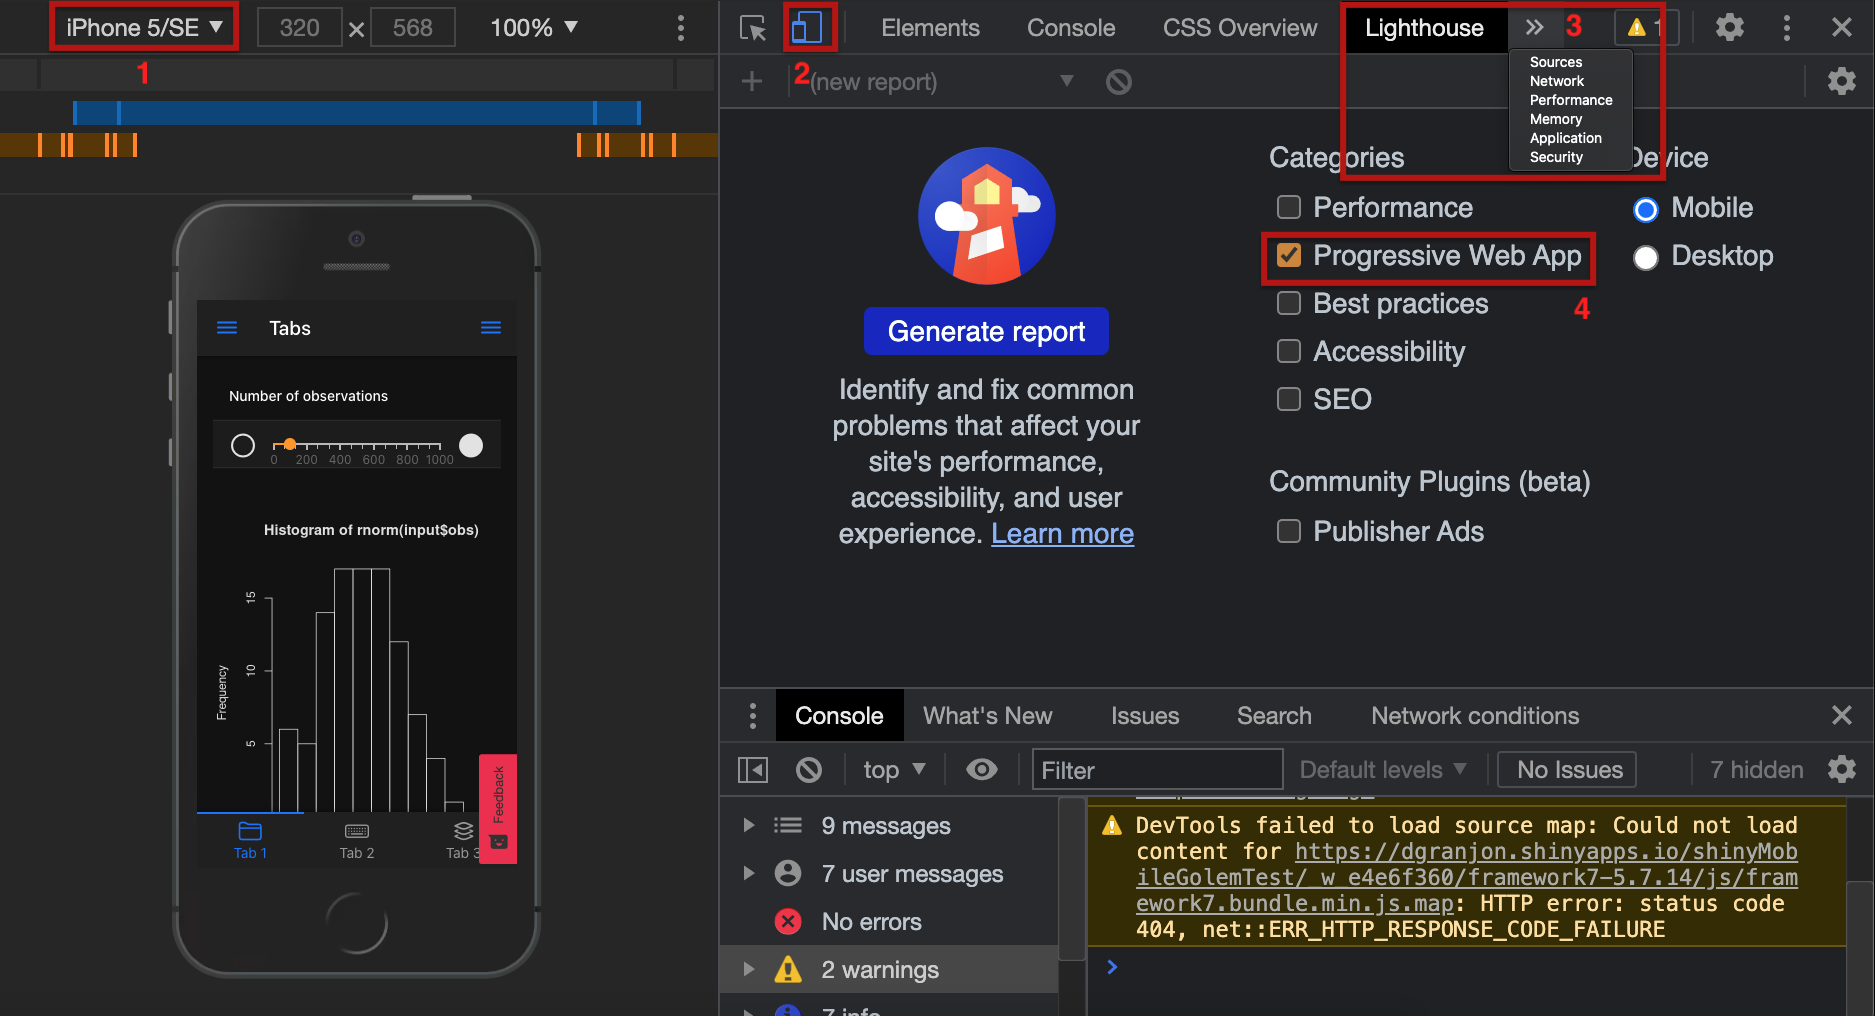
Road to PWA: Check your app (2/3)
We aim to see the installable property in green.
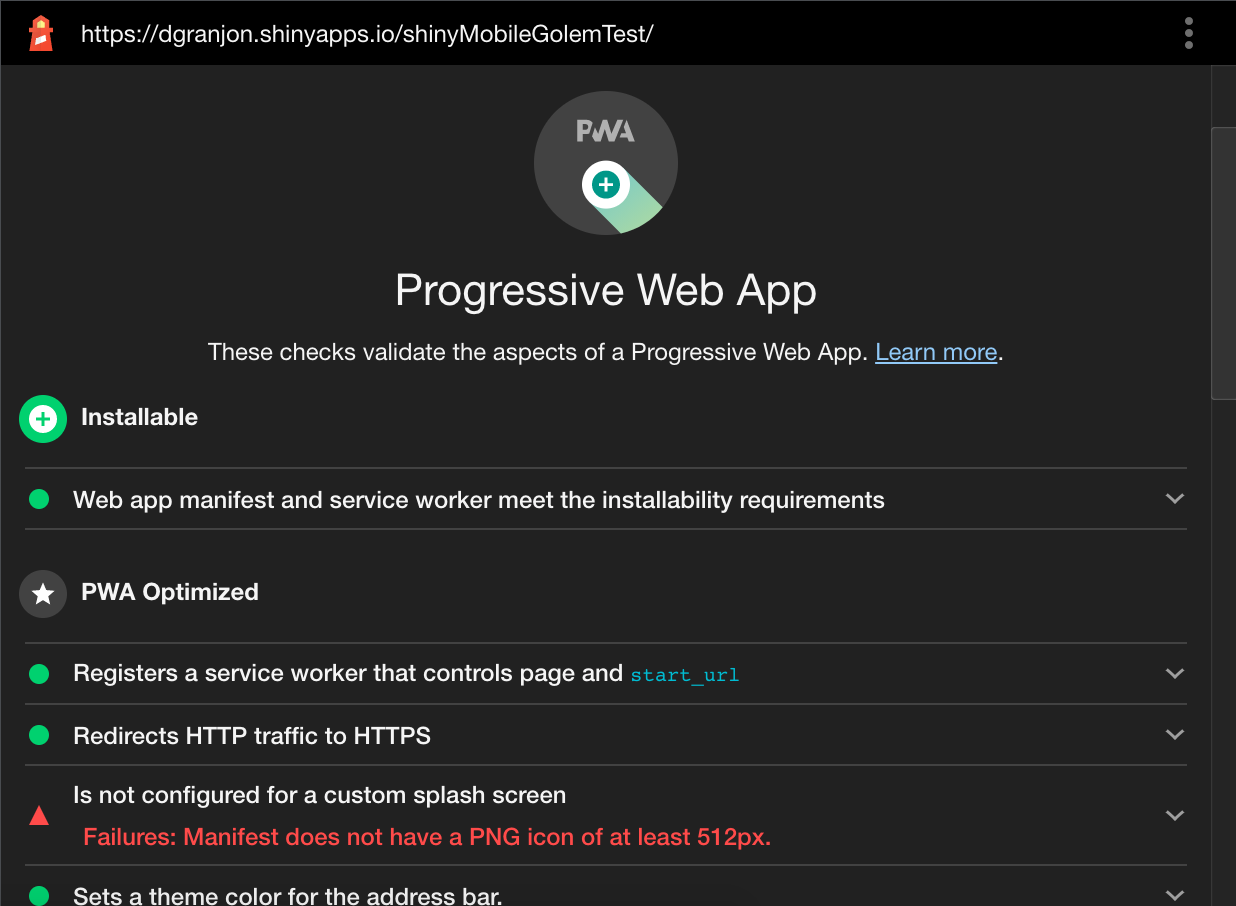
Road to PWA: Check your app (3/3)
Your turn 🧪
- Open the Chrome developer tools: ⌥ + ⌘ + I (Mac), ctrl + shift + I (windows).
- Follow the steps showed in the figure (in red).
- Check that
offline.htmland JS/CSS files are cached (necessary for offline support).
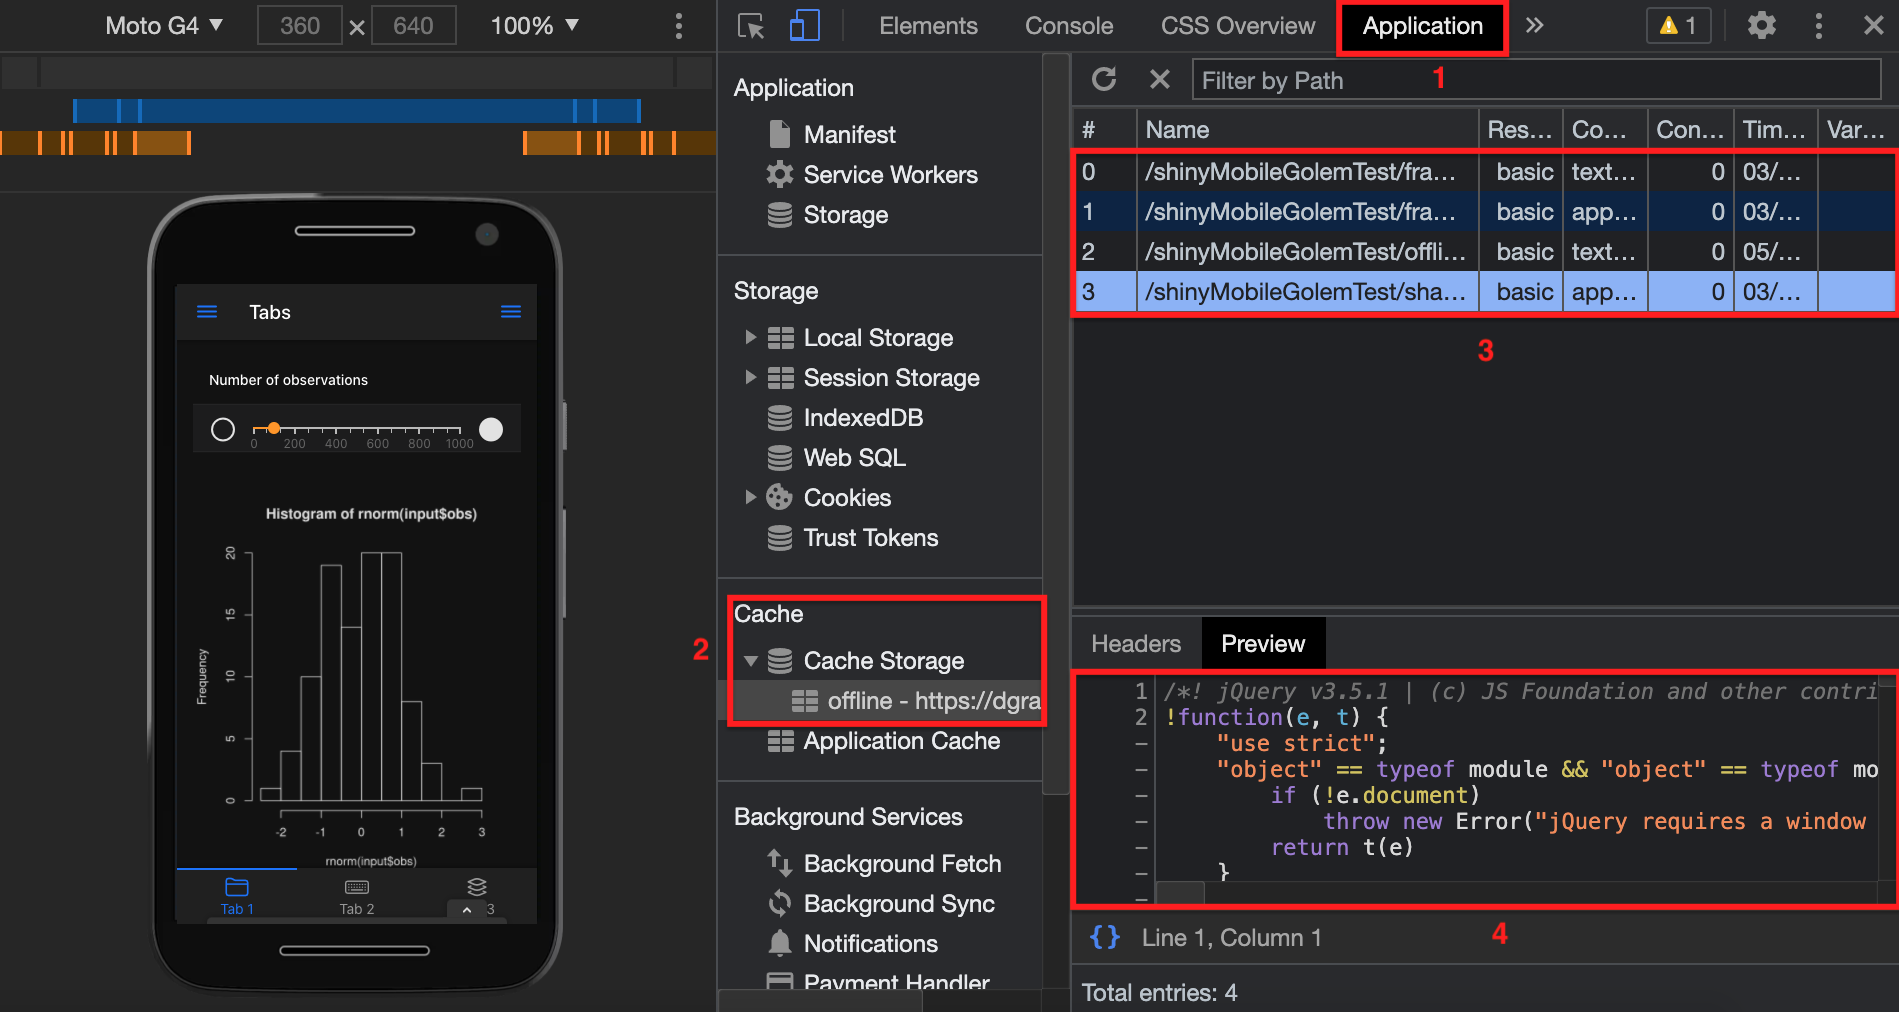
Road to PWA : handle the installation
Desktop

iOS
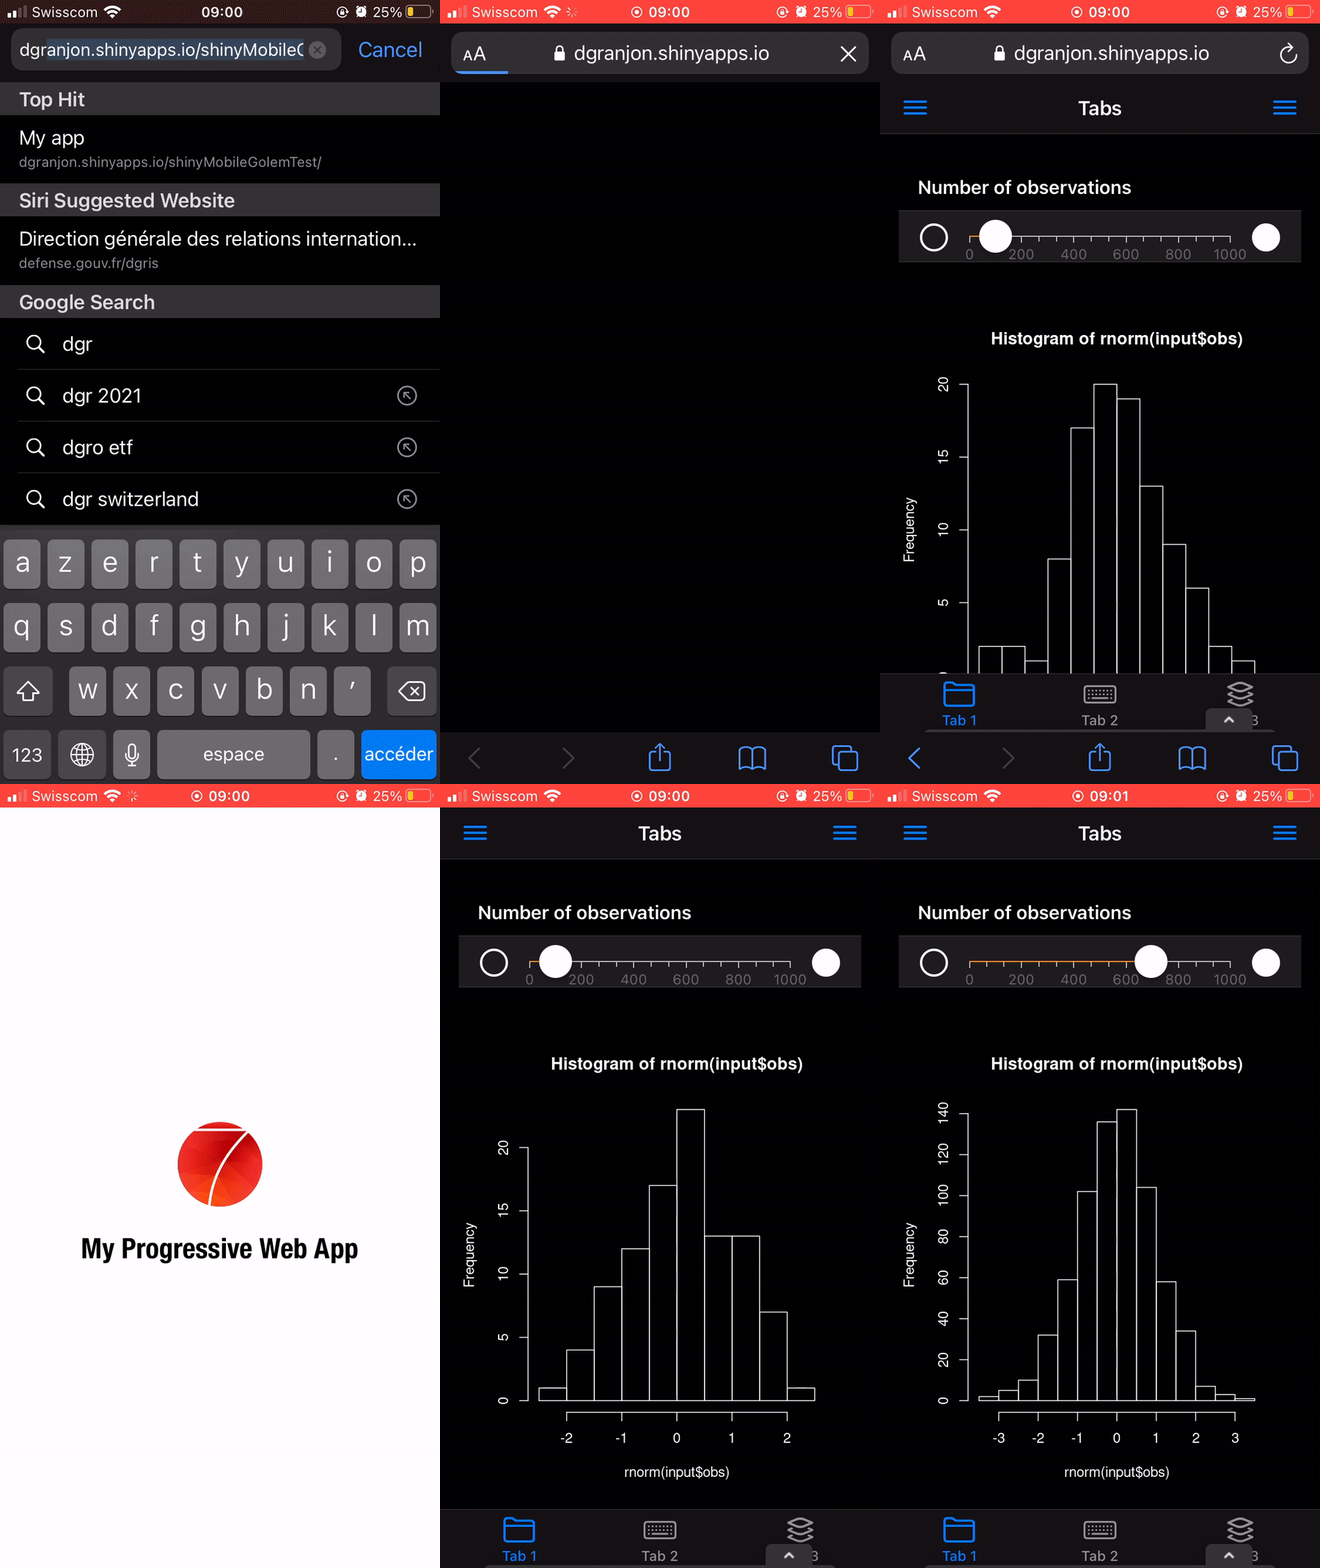
Road to PWA: play around
Your turn 🥼
- Install the deployed app.
- Create a desktop shortcut.
- Launch the app.
- Emulate disabled network connection (Don't shutdown your wifi! See figure 😆).
- Reload the page and observe.
- Re-activate internet and reload the app.
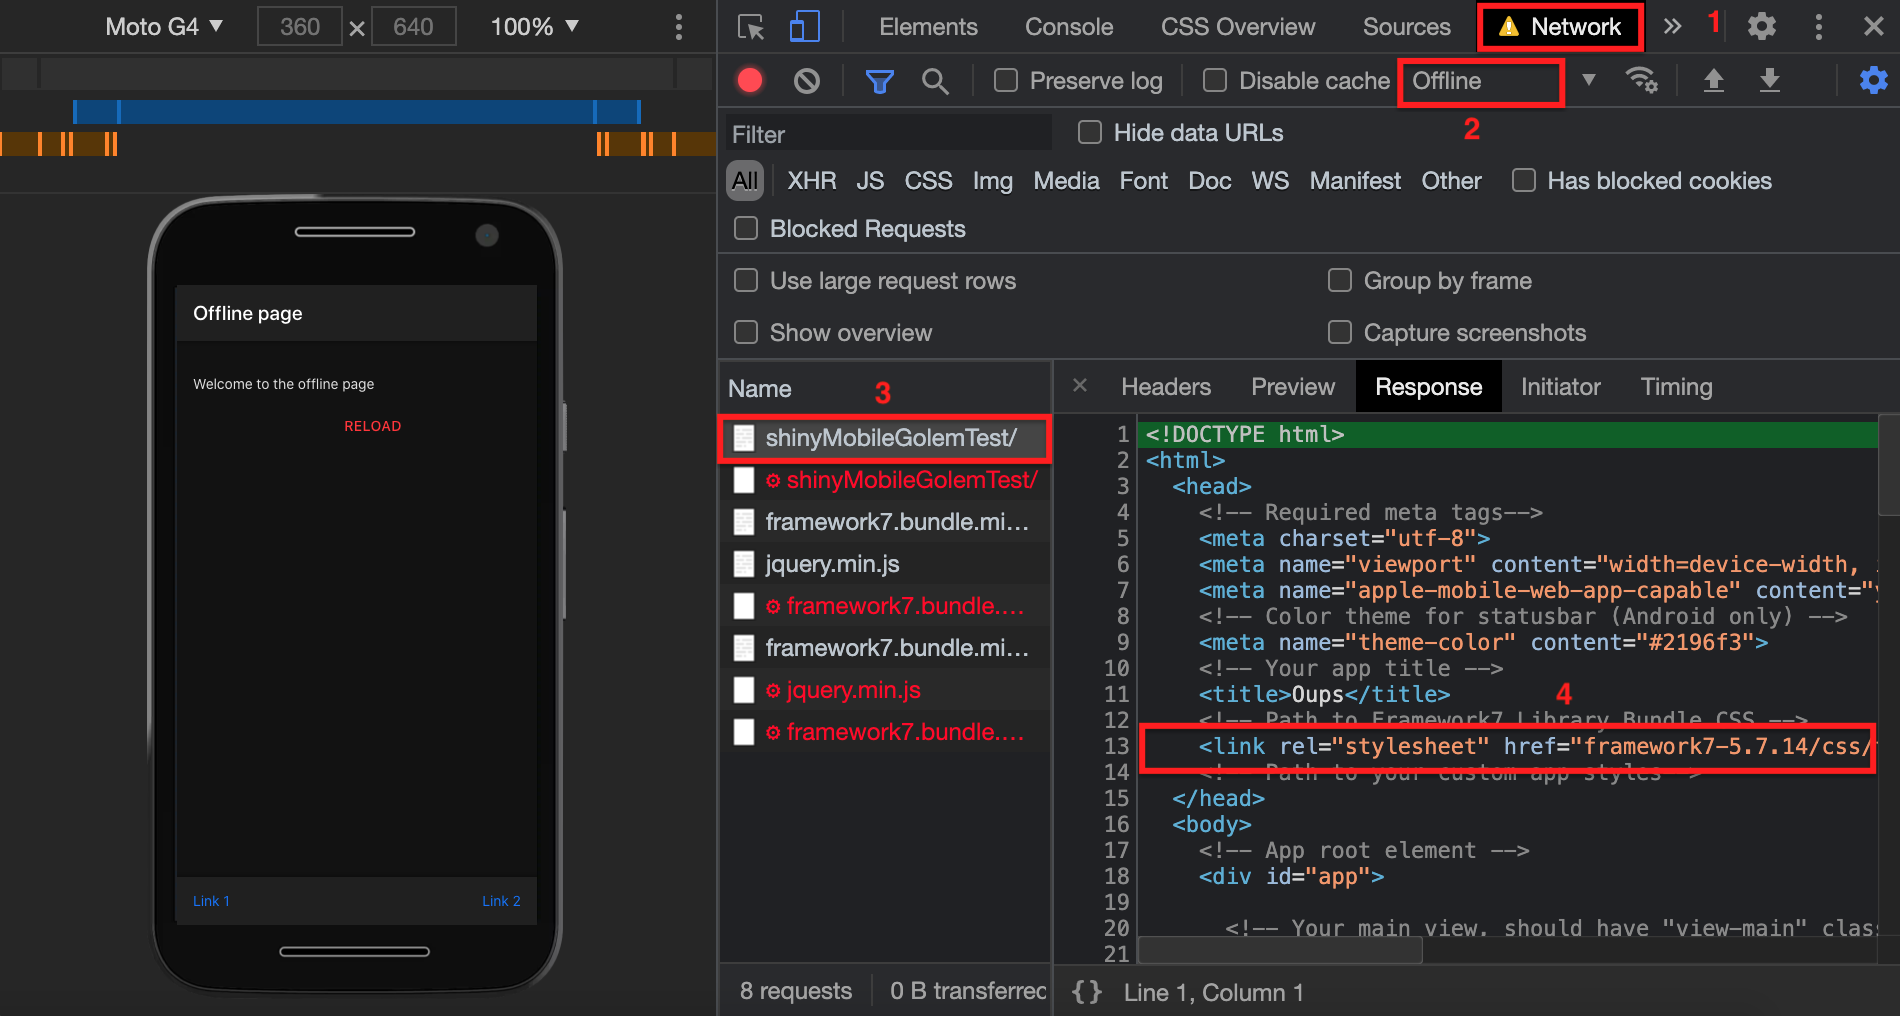
Road to PWA: play around
Your turn 🥼
- Install the deployed app.
- Create a desktop shortcut.
- Launch the app.
- Emulate disabled network connection (Don't shutdown your wifi! See figure 😆).
- Reload the page and observe.
- Re-activate internet and reload the app.

Installed apps can be accessed under chrome://apps/
Road to PWA: What's next?
- Improve the offline HTML page.
- Take this course.
- PWA shortcuts (Windows, Android support).

